Hello everyone,
Today, I’m going to show you how to turn a dress form into a duplicate of your (or your client’s) body. It’s very rare for anyone to have the same measurements as a dress form. Padding is usually necessary and makes dressmaking much easier. There are padding kits available on the market or you can pad it yourself with quilt batting and pillow stuffing. I will be demonstrating the latter. Make sure the dress form is smaller than you are in the bust, waist and hips.
You will need a few supplies. A yard of four way stretch fabric, jersey is great. You can even use an old T-shirt, quilt batting, pillow stuffing, scissors, tape measure and pins, 1/2-3/4 inch length works well for pinning a dress form. You will also need an overlock (commercial) or a serger (home) sewing machine and work table.
Once you have your supplies you need to take your body measurements. The following are the horizontal measurements you need to take on YOUR body, not the dress form. From the top down:
- upper bust.
- bust plus bust point to bust point (two separate measurements).
- lower bust.
- upper hip.
- widest hip.
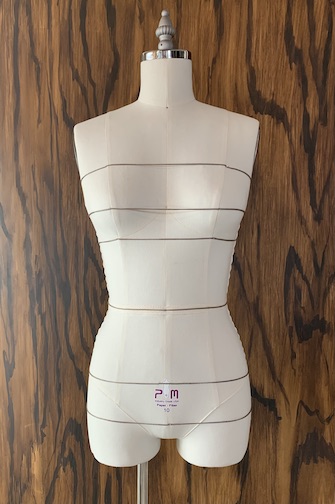
Here are the vertical measurements you need.

- From the base of the neck, on top of the shoulder to the bust point.
- From the base of the neck, on top of the shoulder OVER the bust point to the waist.
- From the waist to the widest part of the hips.
Next, compare your body’s second vertical measurement (from base of neck to waist) to second vertical measurement of the form. Is the bust point higher or lower? If it’s lower, would it be easier to build up the shoulder with padding or lower the bust point by padding the lower part of the breast on the form? If your bust point is higher than the form you can add padding to the top part of the breast on the form.
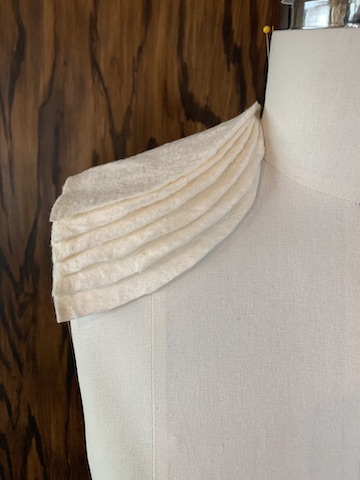
For me it was easier to pad the shoulders. Here are the steps I took:
- Measure the length and width of the shoulder, as if to make a shoulder pad, for example 8 inches wide by 5 inches high.
- Cut two piece of quilt batting according to those measurements.
- Round the top corners.
- Cut another piece just like it.
- Trim 1/2″ off the sides only.
- Repeat steps 4 and 5 until you have the thickness you need to make the dress form measurement match your body measurement.

Use your short pins (1/2-3/4inch length) to pin these pieces to the dress form. Put pins in at a sharp angle.
The next area to be padded is the waist. Cut a piece of batting the height of the middle section of the form (12 inches in my case). The width of this piece depends on your shape. I made mine 24 inches because most of my weight is in the front. Take a look at your own body and try to determine how wide you need it to be. It can be the size of your waist measurement if you need it to go all the way around.
- Pin the top and sides of this piece to the form just below the bust.
- fill with the pillow stuffing until it measures the same as your waist measurement or larger. Sometimes the cover compresses the padding.
- Pin the bottom closed.

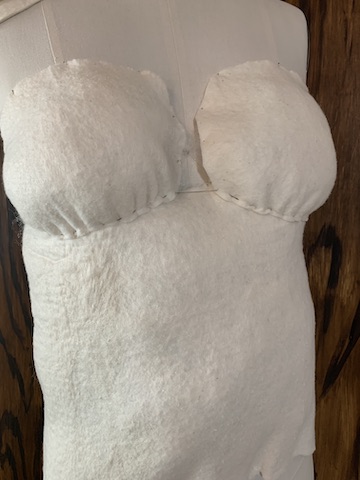
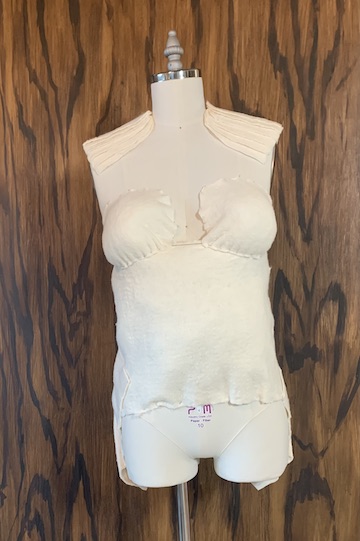
Now, we will work on the bust line. My body’s upper bust measurement was actually a little smaller than the form so I didn’t want to add anything to that part of the form. I cut two pieces of batting just big enough to cover each side of the bust (8×9 inches), rounded the corners and pinned them horizontally to the top half to the form just like I did with the waist. Then I stuffed them with the stuffing until it measured the same as my bust measurement or larger. Double check the bust point to bust point measurement and adjust as needed.

Sew the bottom closed by hand making sure it’s secured to the layer beneath it.
Repeat the process for the hips.
- Cut a piece of batting (12×24 inches for me).
- Pin the top half to the form.
- Stuff until it measures the same as the widest hip measurement or larger.
- Pin the bottom closed
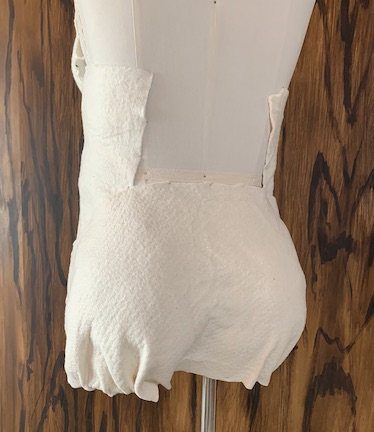
The padding is finished
Lay the stretch fabric out on a table. Most fabric is about 60 inches wide. It comes off the bolt folded in half so it should measure around 30 inches by one yard on the table. Fold the yard in half so it measure 18×30 inches. Cut a small hole in the folded corner.
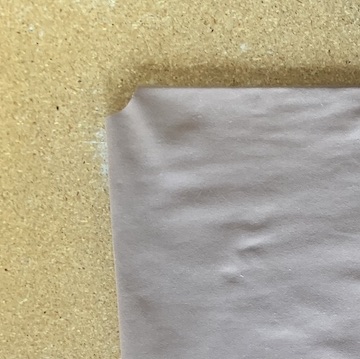
Place the hole over the neck of the dress form. Cut it bigger if needed. Mark a line around the neck and trim.

Place the fabric on a table folded the way it was on the bolt, with the neck opening on top along the folded edge.
- Draw a vertical line down the center, from the neck opening to the bottom. This is the center line.
- Make three perpendicular marks on the center line, one in the middle, one a quarter of the way down and one three quarters of the way down. These marks correspond to the bust, waist and hip measurements. I moved my waist measurement up one inch because my waist is a little high (most people’s are). Adjust as needed.
- Measure across each mark half of the corresponding measurement. For example if the bust is 36 inches, measure 18 inches across, placing 9 inches on the center line. Mark the shoulder measurement, also.
- Mark each measurement with a pin or chalk. If you have a small waist you might want to make the waist measurement a little bigger to make it easier to put the cover on the form
- Connect these measurements using curved lines and baste along the lines

Gently put the cover on the form, inside out, taking care not to disturb the padding.
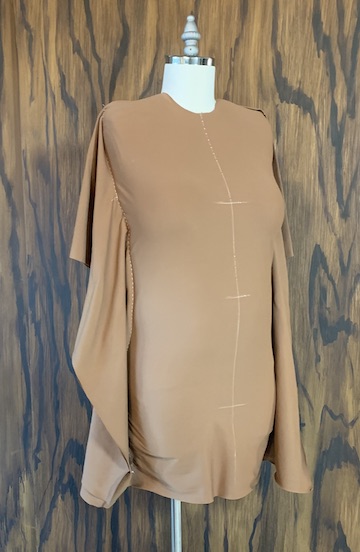
Make any needed adjustments. Use safety pins. Remove the cover and overlock the seams. I slanted the shoulders a little on mine.
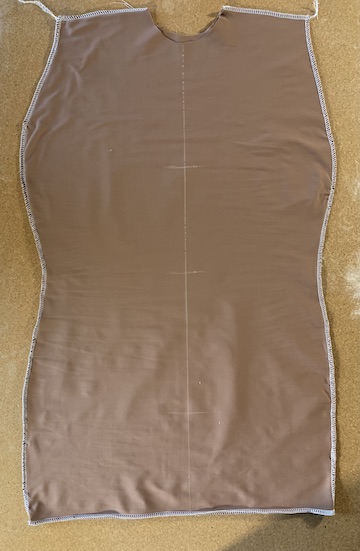
Put it on the form right side out and you’re done!
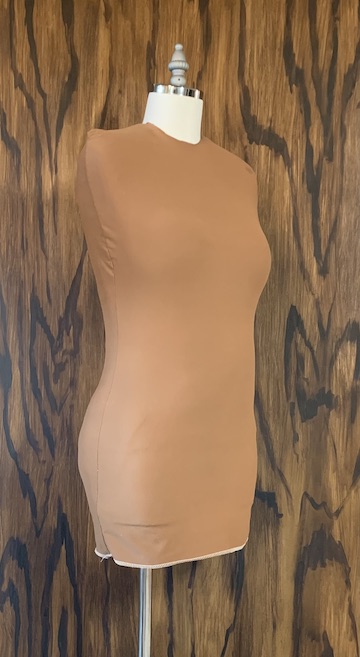
P.S. The neck opening was stretching a little more than I wanted so I made a stand up collar.
- Measure the circumference of the neck opening.
- Measure how high you want the collar to be on the neck.
- Cut fabric the circumference measurement by twice the height measurement.
- Sew the short ends together.
- Fold in half.
- Sew to the neck opening.

ENJOY YOUR DRESS FORM!!!


